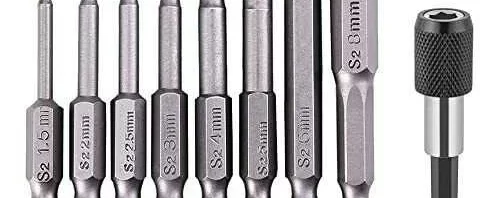
6 Tips to Teach You to Easily Grind a Good Drill Bit
Having a sharp and well-ground drill bit is essential for achieving clean, precise holes in various materials. However, over time, drill bits can become dull and ineffective. Instead of throwing away your old drill bits and buying new ones, why not learn how to grind them yourself? Here are six tips to teach you how to easily grind a good drill bit:
1. Choose the Right Grinding Wheel
The first step in grinding a drill bit is selecting the appropriate grinding wheel. Different types of drill bits require different grinding wheels. For example, high-speed steel (HSS) drill bits need a grinding wheel made of aluminum oxide or silicon carbide, while cobalt drill bits require a diamond or CBN (cubic boron nitride) wheel. It is important to match the grinding wheel to the type of material the drill bit is made of to ensure optimal results.
2. Prepare the Drill Bit
Before grinding the drill bit, it is crucial to properly prepare it. Start by cleaning the drill bit to remove any dirt or debris. Next, inspect the bit for any damage or excessive wear. If the bit is damaged beyond repair or worn out, it may be best to replace it. However, if the bit is salvageable, proceed to the next step.
Use a marker to make a small mark on the cutting edge of the drill bit. This mark will serve as a guide during the grinding process, ensuring an even grind across the surface.
3. Set Up the Grinding Machine
Once the drill bit is prepared, it is time to set up the grinding machine. Ensure that the grinding wheel is securely mounted and aligned with the drill bit. Adjust the angle and position of the grinding wheel according to the type of drill bit and desired outcome.
It is essential to follow the manufacturer’s instructions for your specific grinding machine to ensure safe and effective operation. Always wear protective gear such as goggles and gloves when operating the machine.
4. Start Grinding
With the grinding machine set up, it is time to start grinding the drill bit. Gently bring the cutting edge of the bit in contact with the grinding wheel. Move the bit back and forth across the wheel, applying even pressure. Take care not to overheat the bit or grind too aggressively, as this can damage the cutting edges.
Periodically check the progress by removing the bit from the grinding wheel and inspecting the cutting edges. Continue grinding until the cutting edges are sharp and evenly ground. Remember to frequently cool the bit by dipping it in water during the grinding process.
5. Test and Refine
After grinding the drill bit, it is essential to test its performance. Use a scrap piece of material similar to the one you intend to drill into and check how easily the bit cuts through it. If the bit still does not perform as desired, it may need further refinement.
Inspect the cutting edges for any unevenness or dull spots. Use a fine-grit sharpening stone or honing guide to refine the edges and achieve the desired sharpness. Remember to cool the bit during this process to prevent overheating.
6. Maintain and Store Properly
Once you have successfully ground a good drill bit, it is crucial to maintain and store it properly to ensure its longevity. Clean the bit thoroughly after each use to remove any debris or residue. Apply a light coat of oil to prevent rusting, especially if the bit is made of high-speed steel.
Store the drill bits in a dry and organized manner, preferably in a dedicated case or box. This will help prevent damage and ensure easy access when needed. Regularly inspect your drill bits for any signs of wear or damage and replace them as necessary.
By following these six tips, you can easily grind your own drill bits and save money on replacements. Remember to always prioritize safety and follow the manufacturer’s instructions for your specific grinding machine. With practice and patience, you will be able to achieve sharp and well-ground drill bits for all your drilling needs.
.webp)

